Our team sorts through all blog submissions to place them in the categories they fit the most - meaning it's never been simpler to gain advice and new knowledge for topics most important for you. This is why we have created this straight-forward guide to help you navigate our system.
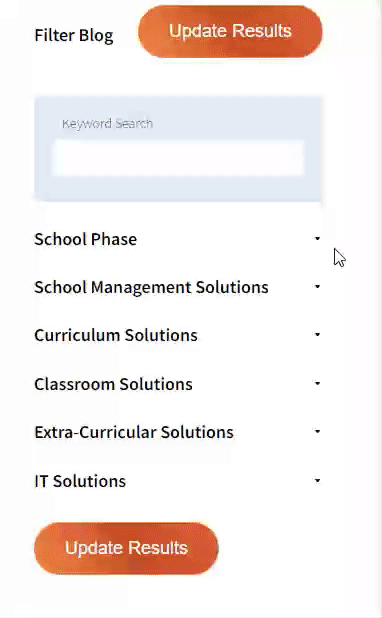
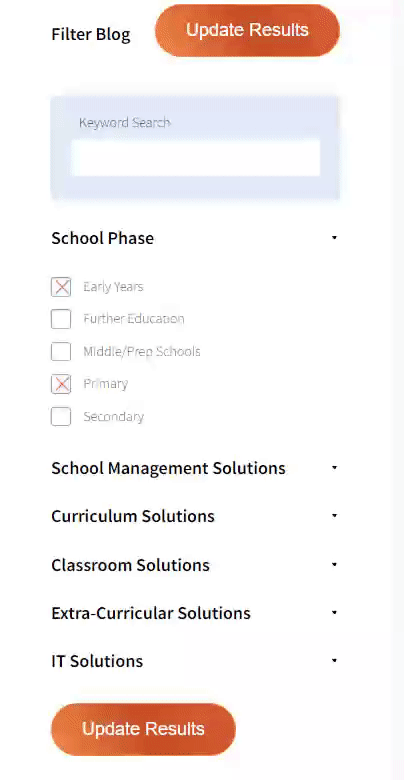
Phase 1: Pick your School Phase
Phase 2: Select all topic areas of choice
Search and Browse
And there you have it! Now your collection of blogs are catered to your chosen topics and are ready for you to explore. Plus, if you frequently return to the same categories you can bookmark your current URL and we will save your choices on return. Happy Reading!
New to our blogs? Click Here >
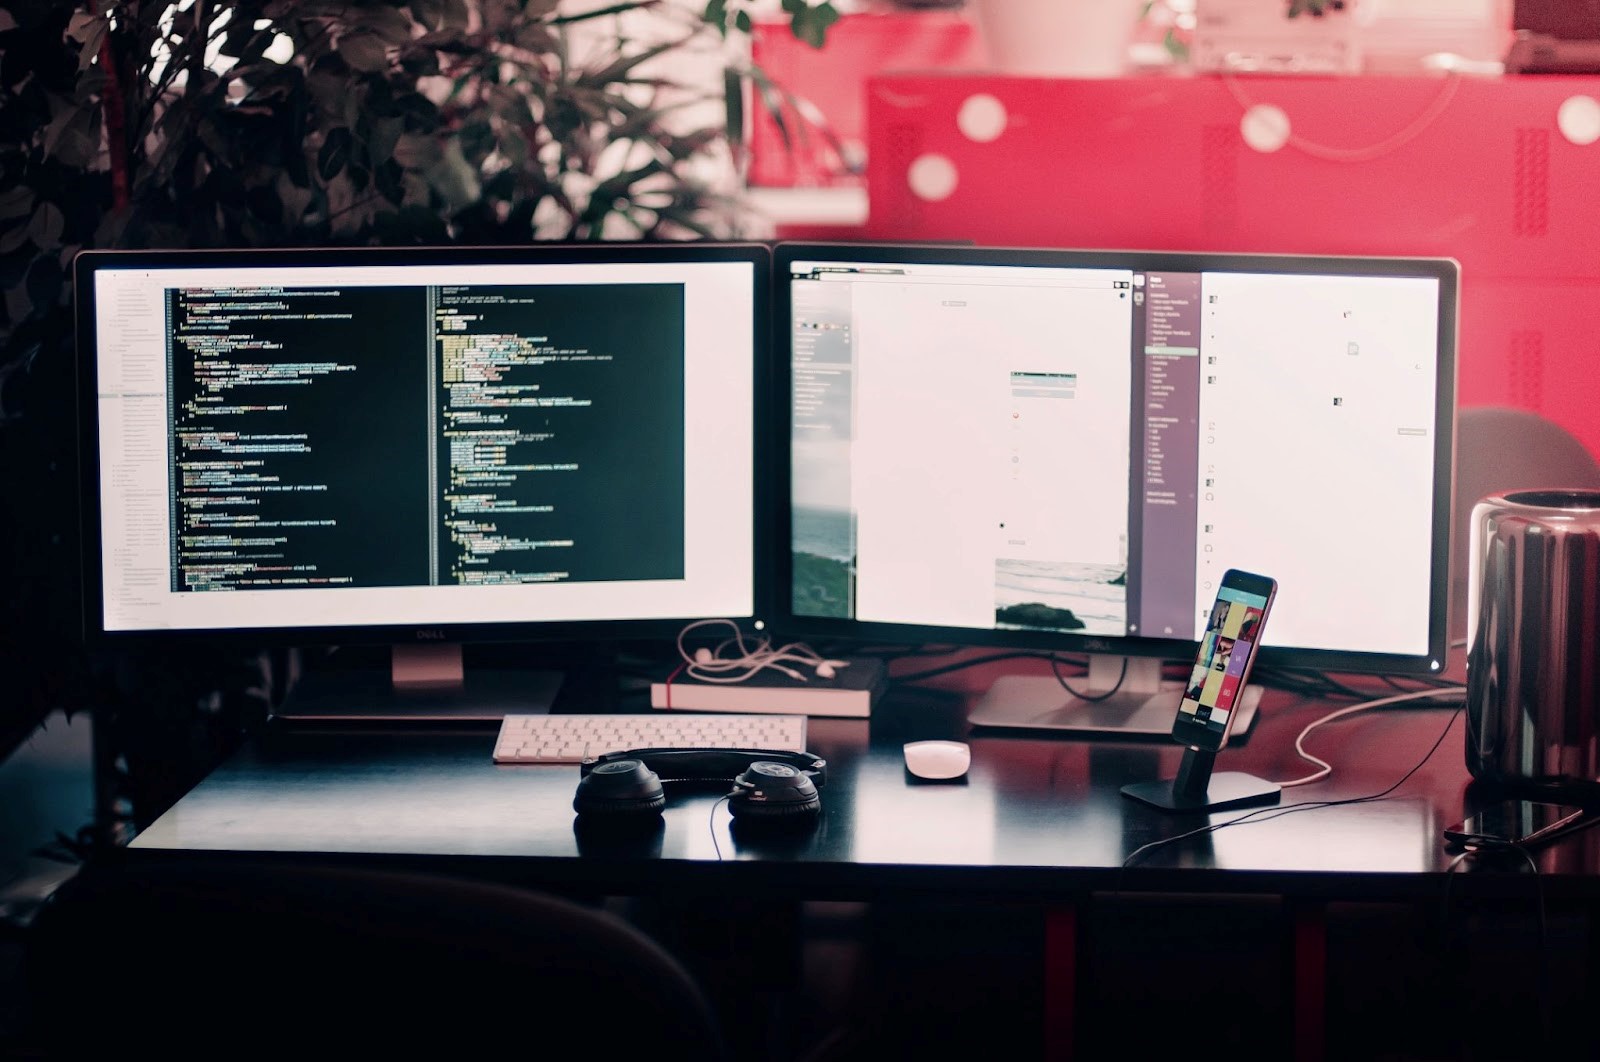
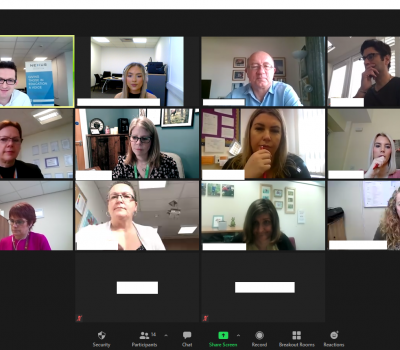
How to Set Up Multiple Monitors for Teaching on Windows 10
In today’s digital age, teaching and learning have evolved significantly. With the advent of technology, educators are no longer limited to traditional chalkboards or projectors. Instead, they can harness the power of multiple monitors to create an immersive and productive teaching environment.
Windows 10, the popular operating system from Microsoft, offers robust support for setting up multiple monitors for teaching. In this article, we will guide you on setting up multiple monitors for teaching on Windows 10. You can also make google chrome transparent on windows 10.
Let’s dive into it.
Why Multiple Monitors for Teaching
Before entering into the technical aspects of setting up multiple monitors, it’s essential to understand why this can be a game-changer for educators. Multiple monitors provide several benefits in an educational setting:
Enhanced Productivity: With multiple monitors, teachers can simultaneously display their presentation, class materials, and other relevant content. This not only saves time but also enhances productivity.
Better Organization: Teachers can keep different tasks on separate screens, making accessing and organizing their teaching resources easier. This improves efficiency during lessons.
Interactive Teaching: Using multiple monitors allows educators to create a dynamic and interactive learning experience. They can show presentations on one screen while interacting with students or accessing reference material on another.
Multi-Tasking: Multiple monitors enable multi-tasking, which is essential for modern teaching. Teachers can check emails, access teaching tools, and manage online resources without switching between windows.
Engagement: Using multiple screens can make teaching more engaging and visually appealing, capturing students’ attention and making the learning experience more enjoyable.
Required Items for Setting up Multiple Monitors
Before setting up multiple monitors, ensure that your computer hardware supports it. Most modern computers have dedicated graphics cards that can handle multiple displays, but it’s essential to check the following:
Graphics Card: Ensure your computer has a graphics card with multiple video outputs (such as HDMI, DisplayPort, or VGA). If not, you may need to install a dedicated graphics card.
Monitors: You will need at least two monitors. Ensure they are compatible with your graphics card regarding the required ports.
Cables: Purchase the necessary cables to connect your monitors to your computer. Common types include HDMI, DisplayPort, and VGA.
How to Set up Multiple Monitors for Teaching on Windows 10
Once you have the hardware requirements, it’s time to set up your multiple monitors. Here’s a step-by-step guide for configuring multiple monitors on Windows 10:
Connect the Monitors
Turn off your computer and connect the additional monitors to the available video outputs on your graphics card. Ensure the monitors are powered on.
After connecting the monitors, power on your computer.
Access Display Settings
Right-click on an empty area of your desktop.
Select “Display settings” from the context menu. This will open the Display settings window.
Detect the Monitors
Scroll down to the “Multiple displays” section.
Click on the drop-down menu and select “Extend these displays.” This will extend your desktop across all connected monitors.
Click on the “Detect” button. Windows will attempt to detect and identify all connected monitors. Each monitor should be numbered according to it’s physical position (e.g., 1, 2, 3).
Adjust Monitor Orientation and Resolution
Click on each monitor number to access its settings.
You can adjust the orientation of each monitor, whether they are positioned side by side or one above the other.
You can also adjust the resolution for each monitor. It’s essential to select the recommended resolution for the best display quality.
Rearrange Monitors
If the physical arrangement of your monitors does not match the arrangement on the screen, you can rearrange them. Click and drag the monitor icons to match their physical positions.
Set the Main Display
You can choose your primary monitor (the one where the taskbar appears) by selecting it in the Display settings and checking the box that says “Make this my main display.”
Apply Changes
Click the “Apply” button to save your settings.
Windows will ask if you want to keep the changes. Click “Keep changes” if everything looks correct.
Customize Display Settings
Scroll down to the “Multiple displays” section in Display settings.
You can choose how you want to use your multiple monitors, such as duplicating the display, extending the display, or showing the display on one monitor only.
Adjust other display settings like scaling and text size according to your preference.
Test Your Setup
Test your setup by dragging windows across monitors, opening applications, and ensuring everything works as expected.
Make any necessary adjustments in the Display settings to fine-tune your setup.
Tips for Teaching with Multiple Monitors
Setting up multiple monitors is only the first step. Here are some tips to make the most of your multi-monitor setup for teaching:
Organize Your Content: Use one monitor for your presentation or teaching material and another for managing communication tools like chat or email.
Interactive Tools: Utilize interactive whiteboards or annotation software on one monitor while displaying your teaching material on the other.
Multitasking: Keep relevant resources, such as lesson plans, research material, or reference documents, open on the secondary monitor for quick access.
Engage Your Students: Display content on one screen and have student interactions or questions on the other, creating a more engaging teaching environment.
Screen Sharing: If teaching remotely, use one screen to share your presentation or content and another for monitoring your students’ video feeds and questions.
Teaching Tools: Explore various teaching software and applications designed for multiple screens to enhance your teaching experience.
Troubleshooting Common Issues
While setting up multiple monitors is relatively straightforward, you may encounter some common issues:
Monitor Not Detected: If a monitor is not detected, ensure that it’s properly connected to your computer and that the monitor is powered on.
Resolution Mismatch: If the resolution appears incorrect on one or more monitors, adjust the resolution settings in the Display settings.
Screen Flickering: If you experience screen flickering, it could be due to incompatible graphics drivers. Make sure your graphics drivers are up to date.
Taskbar on the Wrong Monitor: If the taskbar appears on the wrong monitor, go to Display settings and select the correct monitor as the main display.
Application Placement: Some applications may default open on the primary monitor. You can manually drag them to the desired monitor and close them. The next time you open the application, it should remember its placement.
Windows Key + P: If you need to quickly switch between display modes (e.g., extend, duplicate, second screen only), press the Windows key and the letter “P” to access the projection menu.
Conclusion
Setting up two PCs for teaching on Windows 10 is a valuable investment in increasing your teaching experience. It provides educators with a more organized, interactive, and efficient way to manage their teaching materials and engage with students.
Ashley Brown is a content creator and digital marketer with a passion for helping businesses in the Gilani engineering industry succeed online. With over 5 years of experience in creating high-quality content, she specializes in creating compelling and informative blog posts, articles, and social media content!
Are you looking for solutions? Let us help fund them!
Nexus Education is a community of over 11,000 schools that come together to share best pract... View More
Established in 2011, One Education is a company at the heart of the education world, supporting over 600 schools and academies. Our unique appeal a... View More
School Space is a social enterprise that has empowered schools for over 14 years through their profitable and hassle-free lettings services. So far... View More
There’s nothing special about the energy we sell. In fact, it’s exactly the same energy as all our competitors provide. But there is something spec... View More
Securus provide market-leading monitoring solutions to safeguard students on ALL devices both online and offline. We also offer a full monitoring s... View More
Robotical makes Marty the Robot - a walking, dancing coding robot that makes programming fun and engaging for learners as young as 5. Our robots co... View More